目标
上个step实现了对象创建的多种策略,包括JDK反射创建和CGLIB创建,最终都是为了能够更具构造器创建对象,但是我们发现,虽然创建了对象,但是无法自动为对象属性赋值,这个step就让我们实现对象属性的自动赋值
说到属性注入,你首先想到的方法是什么?
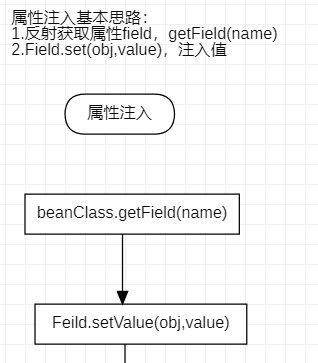
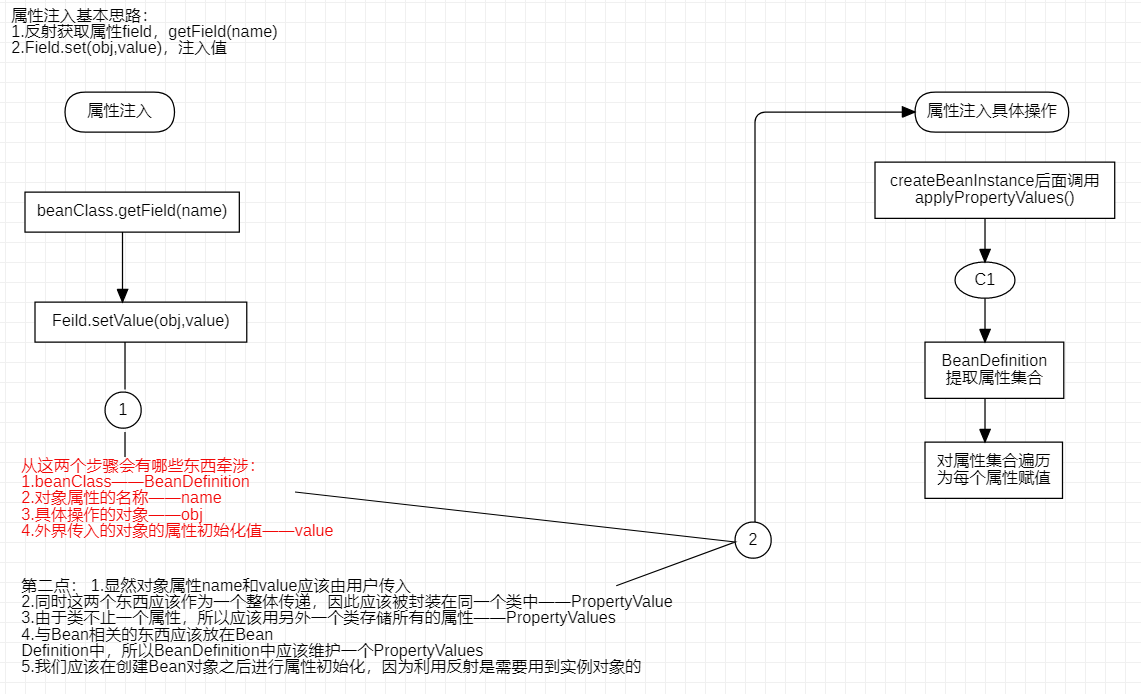
反射,既然有了BeanDefinition,通过反射获取对象的field,然后直接将值赋给field,首先这个方法是正解,基本流程图:

用类封装属性
通过《反射注入属性流程图》,我们大致能了解从这两个步骤会有哪些东西牵涉:
1.具体操作的对象——obj 对于第三点,反射注入属性首先需要对象实例存在,那么属性注入的方法操作应该放在createBean()之后;
2.对象属性的名称——name 外界传入的对象的属性初始化值——value 属性注入需要名称获取Field,和初始化值value,由于这两个值需要同时使用,所以将它们封装在一个类中进行传递比较合适,这就产生了PropertyValue,又因为一个类不止一个属性,所以还需要一个类缓存所有的属性信息,这就是PropertyValues的由来
3.beanClass——BeanDefinition 反射依靠Class对象,所以我们需要BeanDefinition,1.同时我们应该将PropertyValues作为BeanDefiniton的属性,毕竟PropertyValues和Class对象是需要同时使用的,2.而且BeanDefinition就是存储Bean相关的信息,属性信息当然与Bean相关,3.而且目前BeanDefinition是暴露给客户端的,由客户端控制,同时beanClass和PropertyValues应该也由客户端指定,所以PropertyValues由BeanDefinition管理理所当然
类PropertyValue和PropertyValues
1
2
3
4
5
6
7
8
9
10
11
12
13
14
15
16
17
18
19
20
21
22
23
/**
 * bean 属性信息
 */
public class PropertyValue {

    private final String name;

    private final Object value;

    public PropertyValue(String name, Object value) {
        this.name = name;
        this.value = value;
    }

    public String getName() {
        return name;
    }

    public Object getValue() {
        return value;
    }

}
仔细观察这个类,你会发现没有setter,也就是说没有必要暴露对外修改name和value的必要,毕竟客户端要想修改,直接覆盖就可以了
1
2
3
4
5
6
7
8
9
10
11
12
13
14
15
16
17
18
19
20
21
22
23
24
25
26
public class PropertyValues {

    private final List<PropertyValue> propertyValueList = new ArrayList<>();

    public void addPropertyValue(PropertyValue pv) {
        this.propertyValueList.add(pv);
    }

    /**
     * ArrayList类型——》数组类型,里面的数据原封不动,或许是为了防止客户端直接对propertyValueList进行操作
     * @return
     */
    public PropertyValue[] getPropertyValues() {
        return this.propertyValueList.toArray(new PropertyValue[0]);
    }

    public PropertyValue getPropertyValue(String propertyName) {
        for (PropertyValue pv : this.propertyValueList) {
            if (pv.getName().equals(propertyName)) {
                return pv;
            }
        }
        return null;
    }

}
这个类将propertyValueList的添加,查询都封装在了内部(唯独没有修改方法),同时提供getPropertyValues(),相当于是获取数组拷贝,避免PropertyValueList被外界直接修改,这样会更加安全
属性注入方法applyPropertyValues
1
2
3
4
5
6
7
8
9
10
11
12
13
14
15
16
17
18
19
20
protected void applyPropertyValues(String beanName, Object bean, BeanDefinition beanDefinition) {
        try {
            PropertyValues propertyValues = beanDefinition.getPropertyValues();
            for (PropertyValue propertyValue : propertyValues.getPropertyValues()) {

                String name = propertyValue.getName();
                Object value = propertyValue.getValue();

                if (value instanceof BeanReference) {
                    // A 依赖 B,获取 B 的实例化
                    BeanReference beanReference = (BeanReference) value;
                    value = getBean(beanReference.getBeanName());
                }
                // 属性填充
                BeanUtil.setFieldValue(bean, name, value);
            }
        } catch (Exception e) {
            throw new BeansException("Error setting property values:" + beanName);
        }
    }
BeanUtil的作用是区别不同类型的属性,比如属性的类型可能是数组,map,List,获取自定义的引用类型,这些都要分别处理
同时我们发现有这么一个东西:BeanReference,我们知道Bean的属性可能也是待实例化的Bean,而BeanReference就是为了区别出这些Bean从而递归创建这些Bean的依赖,当然我们也可以让客户端直接先创建出依赖Bean,即先从容器中获取,就像下面这样:
1
2
3
4
5
6
7
8
9
10
11
12
// 3. UserService 设置属性[uId、userDao]
        PropertyValues propertyValues = new PropertyValues();
        propertyValues.addPropertyValue(new PropertyValue("uId", "10001"));
        propertyValues.addPropertyValue(new PropertyValue("userDao", beanFactory.getBean("userDao")));


        // 4. UserService 注入bean
        BeanDefinition beanDefinition = new BeanDefinition(UserService.class, propertyValues);
        beanFactory.registerBeanDefinition("userService", beanDefinition);

        // 5. UserService 获取bean
        UserService userService = (UserService) beanFactory.getBean("userService");
但这样存在一个功能上的差距,即对象之间的依赖关系控制在了客户端手里,而实际上作为Bean容器,它应该主导这个功能,毕竟这个功能很复杂,由容器来处理,客户端会轻松很多
BeanDefinition
这么一来依赖注入的功能基本就完成了,下面看看BeanDefinition的变化:
1
2
3
4
5
6
7
8
9
10
11
12
13
14
15
16
17
18
19
20
21
22
23
24
25
26
27
28
29
30
31
32
public class BeanDefinition {

    private Class beanClass;

    private PropertyValues propertyValues;

    public BeanDefinition(Class beanClass) {
        this.beanClass = beanClass;
        this.propertyValues = new PropertyValues();
    }

    public BeanDefinition(Class beanClass, PropertyValues propertyValues) {
        this.beanClass = beanClass;
        this.propertyValues = propertyValues != null ? propertyValues : new PropertyValues();
    }

    public Class getBeanClass() {
        return beanClass;
    }

    public void setBeanClass(Class beanClass) {
        this.beanClass = beanClass;
    }

    public PropertyValues getPropertyValues() {
        return propertyValues;
    }

    public void setPropertyValues(PropertyValues propertyValues) {
        this.propertyValues = propertyValues;
    }
}
提供了依赖注入需要的构造器,其他的就每什么特别的了
总体设计流程图

